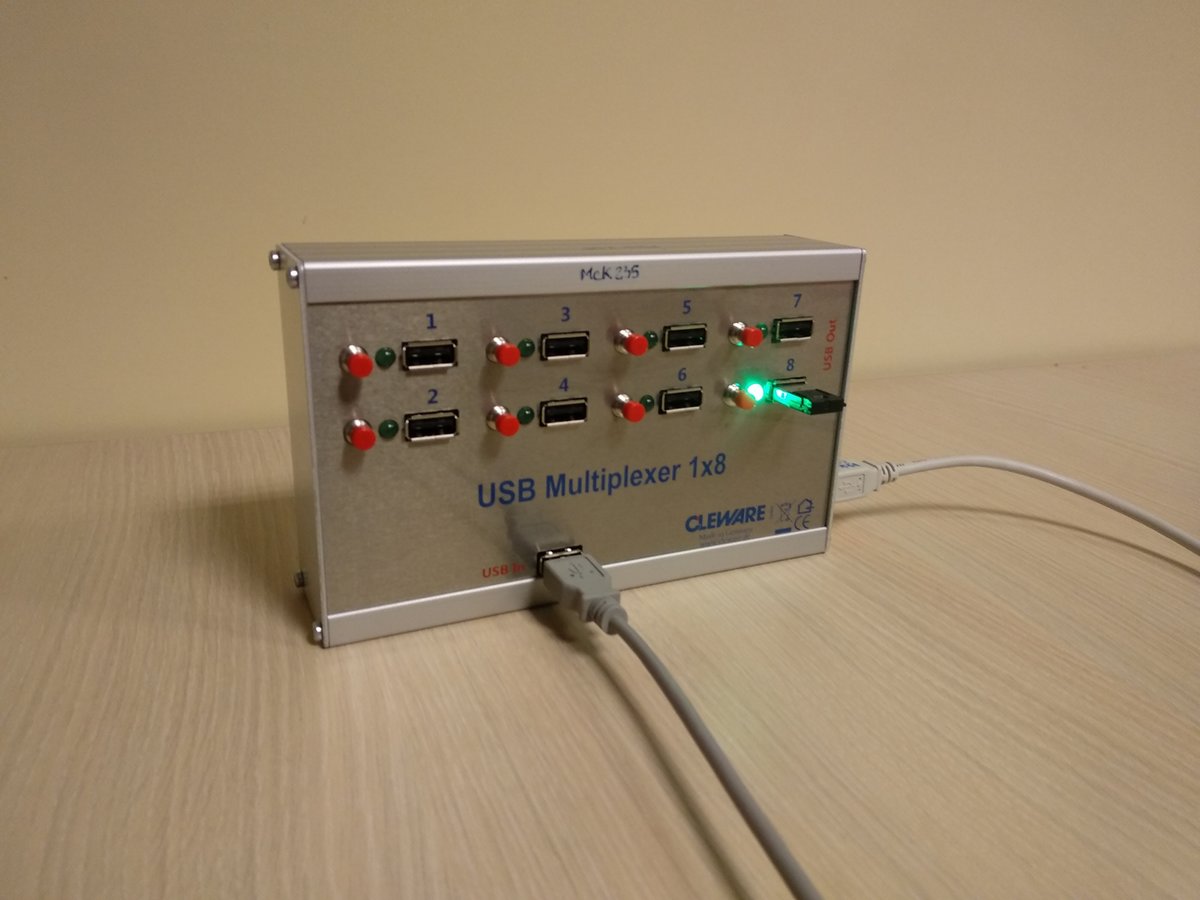
Writing a Python driver for a USB Multiplexer device

After getting used to the uiautomator tool for future tasks we were asked to write a driver for a device our colleagues needed to use in their test environment.
They had this 8 ports USB Multiplexer from Cleware; it allows you to switch from USB ports(or to simulate a USB plug-in or plug-out) by the press of a button or through a computer command. Their goal was to integrate it in their test flow to automate USB plugs-in and plugs-out programmaticaly.
The manufacturer did provide some documentation as well as some piece of software in the C language to interact with the device. However the test tools that our colleagues use are written in Python and, thus, they needed a tool to control the device written in Python.
We had the choice to either make a wrapper of the manufacturer’s tool, or, better and more interesting for us to code, to develop a driver in Python that has no C code dependency. We went for the latter.
The documentation available on the manufacturer’s website was not really helpful. We downloaded the code samples off their website and compiled it on our machines as we dug through the code to understand how it worked.
The tool was meant to run on Linux machines; I had a virtual machine running Linux Debian to work on but it wasn’t really convenient to work with, especially because I wasn’t sure how USB port forwarding was done between the virtual machine and the Windows host, so I installed a Linux operating system in dual boot with Windows 10.
I had to do a lot of research regarding the way Linux operating systems communicates with USB devices, especially with Human Interface Devices. HID are devices such as mice or keyboards that communicates with an Operating System through an USB port on the host machine. The device sends data buffers to the OS via the USB port, or the other way around, and a driver on the OS understands those raw data and act accordingly (it moves the cursor if we take an USB mouse as an example). In Linux it is done through reading and writing to a file corresponding to the HID, located under the /dev folder.
In the case of our Multiplexer, our driver had to know which USB port was turned on on the device from the data it received through the USB port; and it also had to send the correct data buffer to the device so it would switch to the desired port. We didn’t have access to the Multiplexer’s code so we had to look at the piece of software we had from the manufacturer to get the data buffers, corresponding to each port switch, out of it. We found out the followings :
Data buffers sent by the device:
000000 00 88 00 -> all ports off
000000 01 88 00 -> port 1 on
000000 02 88 00 -> port 2 on
000000 04 88 00 -> port 3 on
000000 08 88 00 -> port 4 on
000000 10 88 00 -> port 5 on
000000 20 88 00 -> port 6 on
000000 40 88 00 -> port 7 on
000000 80 88 00 -> port 8 on
Data buffers to send to the device:
59 00 -> switch port off
51 01 -> switch to port 1
51 02 -> switch to port 2
51 04 -> switch to port 3
51 08 -> switch to port 4
51 10 -> switch to port 5
51 20 -> switch to port 6
51 40 -> switch to port 7
55 80 -> switch to port 8
We now had to code the method to get the HID file matching the Multiplexer device, the method to read and parse it’s data to retrieve the current port being switched on and the method to write the corresponding data buffers to switch the ports.
Accessing the HID for inputs and outputs using Python was pretty straightforward and easier than expected:
# Basic I/O with HID
class _HID:
    @staticmethod
    # Write the data buffer to the HID given by hidraw_number
    def write(hidraw_number, data):
        dev = os.open("/dev/hidraw" + str(hidraw_number), os.O_WRONLY)
        ret = os.write(dev, data)
        os.close(dev)
        return ret

    @staticmethod
    # Read the hex dump of the HID given by hidraw_number and return it as a string
    def read(hidraw_number):
        dev = os.open("/dev/hidraw" + str(hidraw_number), os.O_RDONLY)
        data = os.read(dev, 6)
        os.close(dev)
        return data.encode("hex")
We then wrote a program to use our tool via command line and a documentation for our colleagues to understand the tool and to be able to embed it in their code. While coding the tool’s methods we also coded some unit tests to assert that the methods are working the way they should.
Once we had achieved this task we packed the whole in a zip file and we sent it to our colleagues through Skype.